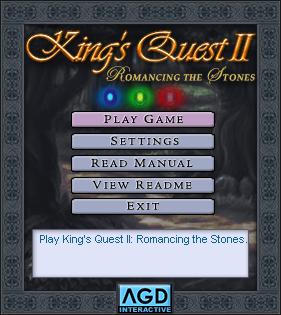
Once King's Quest II Remake has been installed, you can run the game by clicking on the AGD Interactive program group from the start menu, where you will see an icon to play the game. Alternatively, you can locate and click the Launcher.exe file in the game folder to run the menu launcher, or KQ2VGA.exe to run the game directly. Running the Winsetup.exe file will permit you to run the setting program to change game settings and options.
Mac
Once King's Quest II Remake has been installed, you can run the game by clicking on the King's Quest II application in your application folder - or wherever you chose to install the game.
Playing the game
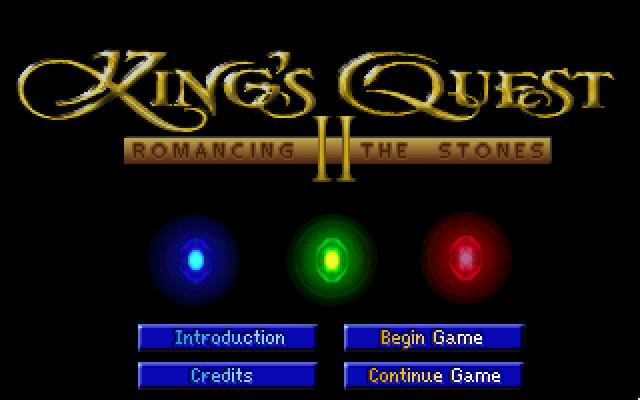
After you have loaded the game, wait for the title screen to appear. From here you can click on the Introduction button to watch the game's introduction sequence. First-time players should watch the introduction sequence prior to starting the game in order to get a better understanding of their quest.
Once you have finished watching the introduction scene, click on the Start Game button to begin your mission.
When playing an adventure game like King's Quest II for the first time, there may be times when you find yourself stuck or seemingly unable to progress further into the game. If such is the case, typically the best approach is to explore each screen thoroughly. Pay special attention to to things in each screen; you never know what could be useful on your quest. Pick up anything that isn't nailed down, and speak to everyone possible in order to find out what they know. Experiment with items in your inventory by clicking them on different characters or objects in the land of Kolyma. Sometimes the solutions to puzzles can be solved directly, and other times the solutions are more obscure, requiring more thought.
The icon bar
The game is played using a pop-up icon bar interface. The icon bar appears whenever you move your mouse up to the very top of the game screen. Select the appropriate icon from the pop-up bar and then click it in the game screen to perform the currently selected action.
The icons are Walk, Look, Interact, Talk, Item, Inventory, Options and Help.
Walk: allows your character to move around the area in walk mode. Simply click the icon wherever you want your character to walk to.
Look: permits you to look at things in the game world, such as the screen you are standing in, other characters, or your inventory items.
Interact: allows your character to interact with the world around him, such as opening a door, lifting a rock, etc.
Talk: allows you to speak with other characters (if a conversation is possible)
Item: stores the inventory item you last selected for fast and easy access. In the image above, the earrings are the currently selected inventory item.
Inventory: opens the inventory window - see below.
Options: opens the options menu - see below.
Help: displays several help and information text windows about the game.
Note that there is a small red point on the Walk, Look, Interact, Talk, and Item icons. This point represents the icon's "hotspot" and allows you to pinpoint exactly where you wish to click.
Skip Scene (not on icon bar): When a green arrow appears over the wait crown icon, the current non-interactive sequence may be bypassed by pressing the Escape key. Since some sequences contain information vital to completing the game, the Skip Scene icon will only appear if you have already finished the game at least once.
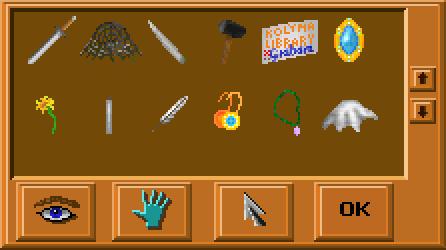
The inventory
The inventory window is best described as your character's backpack, where he stores all of the items that he has collected during the course of the game. Your inventory can be accessed in two different ways: either by moving the mouse to the top of the screen and clicking the inventory button (the red bag) in the icon bar, or by pressing the Tab key (or CTRL+I in Windows or CONTROL+I on Mac) during the game. A window will appear, displaying all the items that your character is currently carrying.
To select an item from your inventory for use in the game screen, click the arrow pointer on the item. Your mouse cursor will change into that item. Click the OK button to close the inventory menu and return to the game. With your mouse cursor still representing the item, click on the character, object or screen area where you wish to use the item.
Note: if you want King Graham to eat, drink, open, or otherwise personally interact with an item in any way, simply click the item in question on Graham himself and watch what happens.
The inventory icon bar at the bottom of the inventory window consists of four buttons:
Look: allows you to inspect items in your inventory. You will be shown the item's name, a brief description and, if applicable, how many of the item you are carrying.
Interact: allows you to feel or manipulate an item in some way.
Arrow: allows you to select the item you have clicked in.
OK: closes the inventory window, If you have an inventory item selected, that item will become your active mouse cursor, allowing you to use it in the game.
Note that you also can (and sometimes must) combine inventory items on each other in the inventory window in order to obtain new inventory items. To do so, select one item with the arrow pointer and click the selected item on another item in inventory.
When you have many items in inventory, you can use the up and down arrows beside the window to scroll through your items.
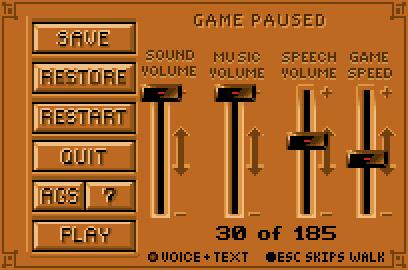
Options menu
The options menu (or control panel) allows you to alter various game settings.
Save: allows you to save the current game. You can have up to 50 save-game files after which you must replace an existing save-game.
Restore: allows you to load a previously saved game.
Restart: allows you to restart the game from the beginning.
Quit: exits the game if you wish to stop playing.
AGS: displays information about the Adventure Game Studio game engine.
Question mark: displays general information about the game.
Play: closes the options menu and returns to the game.
Sound volume: adjusts the volume of sound effects.
Music volume: adjusts the volume of music.
Speech volume: adjusts the volume of narrator and character speech.
Game speed: adjusts the speed of gameplay.
Voice + Text / voice Only / Text Only: select the speech and text settings.
Esc skips walk: Toggling this option on allows you to press the Escape key while walking to automatically skip Graham's walk animation and arrive instantly at the destination point.
Hotkeys and keyboard controls
TAB (or CTRL+I): Show inventory window
F1: Show help information
F5: Save game
F7: Restore game
CTRL+Q: Quit game
CTRL+T: Cycle voice + text modes
F9: Restart game
F12: Save a screenshot
Arrows/numeric pad: Manual character walking (alternative to walk icon)
Escape: Skips walking animation (if ESC skips walk option is enabled)
Right mouse button: cycle through icon bar icons.